This is a multi-part series on electrical systems for overland vehicles. In this installment, we delve into the steps needed to create an efficient DIY vehicle electrical system.
I. Introduction
We understand the crucial role of a good DIY vehicle electrical system. It provides numerous benefits, especially when combined with a hybrid power setup. When venturing into overland expeditions, having a reliable and efficient electrical system becomes paramount to ensure a comfortable journey.
A DIY vehicle electrical system empowers us to tailor the setup according to our specific needs and requirements. Meaning we have the freedom to choose the best components and design to suit our travel style. By taking charge of the electrical system ourselves, we can optimize power consumption, prioritize essential appliances, and ensure we have a continuous power supply throughout our journey. After all, we know the ins and outs of our system in case we encounter any problems.
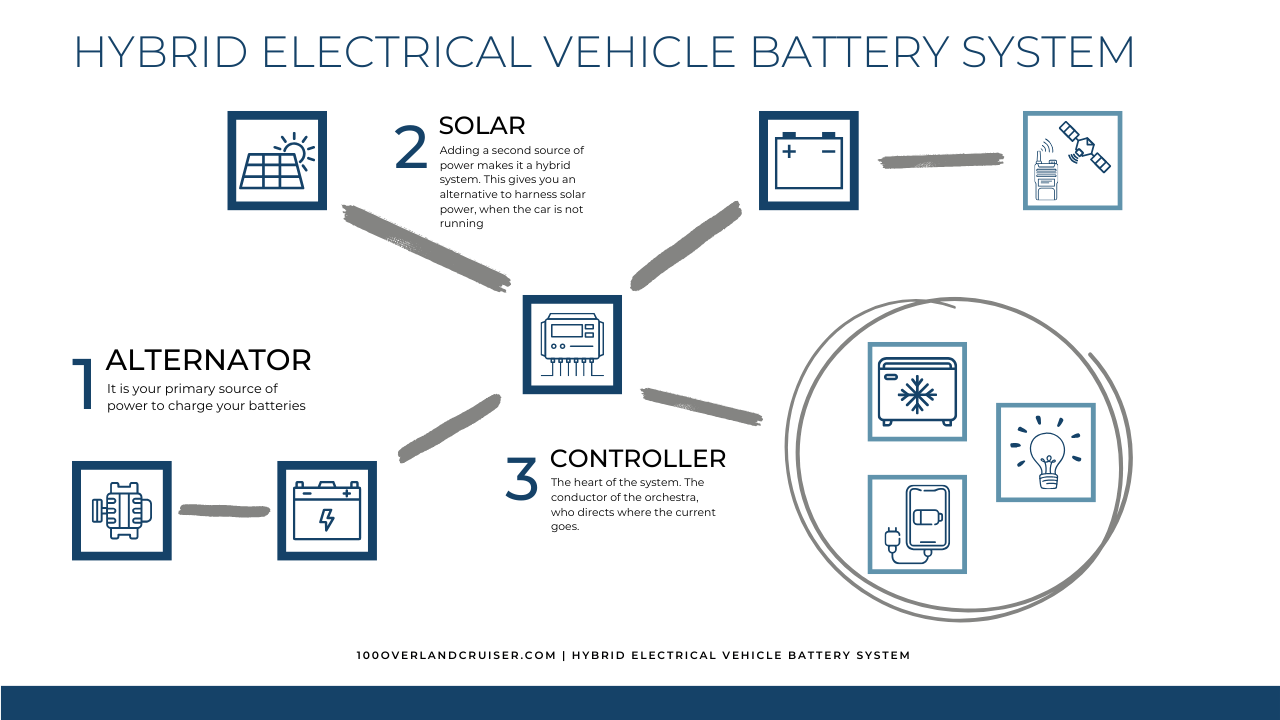
In this series we will focus on a hybrid power setup. What this does is harnesses the power of both an alternator as well as solar panels. Which allows us to maximize our power resources and reduce dependency on a single charging source. This approach not only enhances our vehicle’s self-sufficiency but also contributes to a more sustainable and eco-friendly travel experience.
In the following sections, we will delve deeper into the steps needed to create an efficient DIY vehicle electrical system. From conducting a thorough vehicle assessment to determining the best wire sizes for overland vehicles (Second part can be found here), we will guide you through the process of setting up a reliable and powerful electrical system for your world travel adventures. Start to finish. Stay with us as we embark on this electrifying journey of vehicle electrification.

II. Conduct Vehicle Assessment
Analyzing the vehicle’s electrical system and capabilities
As we are setting up a DIY vehicle electrical system, a comprehensive analysis of the existing system is in order. Our first consideration should be the age of the alternator. For vehicles with a substantial mileage it becomes essential to evaluate the alternator’s health. Over time, wear and tear can affect its efficiency, leading to potential issues during our travels. Therefore, it is prudent to consider replacing the alternator with a dependable power generation throughout our journey. Particularly for Land Cruiser 100 owners, the 300-400k kilometer mark is a great time to upgrade the alternator.
Furthermore, understanding the amperage output of the alternator is crucial. The alternator’s capacity plays a pivotal role in determining whether it can meet the power requirements. By knowing the exact amperage output, we can accurately assess if it aligns with the demands of our electrical setup. This information serves as a critical foundation for designing an efficient power system.
Understanding existing limitations
In addition we must also recognize and address the limitations posed by the vehicle’s current state. Our vehicle’s starting battery and its terminals warrant special attention. A healthy and fully functional starting battery is essential for a smooth and reliable power supply. Checking the battery’s condition and making sure the terminals are clean and well-connected will contribute to the overall stability and longevity of our DIY electrical system.
Moreover, assessing the available space for running wires and conduit is vital. Adequate space provides the necessary room for organizing and routing electrical connections with precision. Ensuring that wires are properly arranged and secured minimizes the risk of tangling or exposing them. That reduces the chances of potential hazards.
Additionally, we need to identify suitable entry points through the vehicle’s firewall. Safely passing wires and conduit through the firewall is a critical aspect of the setup. Ensuring a secure and concealed pathway for the electrical connections. Proper entry points not only protect the wiring but also maintain the vehicle’s integrity (and aesthetics).
By thoroughly analyzing the vehicle’s electrical system and understanding its limitations, we lay a strong foundation for a successful DIY vehicle electrical system setup.
III. Determine DC-DC Charging Speed
Evaluating the vehicle’s charging capacity
It is crucial to evaluate the vehicle’s charging capacity accurately. Ideally, we should refer to a graph that provides detailed information on how much the alternator charges at different revolutions per minute (RPM). This graph offers valuable insights beyond the maximum numbers typically provided for factory alternators.
To obtain this data, we can check the vehicle’s manual, which may contain the alternator’s charging capacity information. Alternatively, we can search online for an original equipment manufacturer (OEM) replacement part and look for the relevant details in the product description.
As an example, the alternator for our Land Cruiser 100 from Terrain Tamer came with such a graph. It was labeled for 110A. Surprisingly, it was capable of generating around 160-170A at 4000-5000 RPM. At least according to the graph. In reality, even at idle, it consistently provided 10-20 amps, depending on the battery’s state of charge. Understanding these real charging capabilities is essential for designing an effective and efficient DIY vehicle electrical system.

Here is a List of Vehicles that Terrain Taimer offers alternators for.
Sizing DC-DC charger and charging speed
For optimal performance of your DIY vehicle electrical system, it is essential to pick the right DC-DC charger. This device serves as a vital intermediary between the alternator and the auxiliary battery. It ensures efficient charging and power distribution based on the type of battery you choose.
When selecting a DC-DC charger, we need to consider the charging speed it offers. Without an aftermarket high-amp alternator, a DC-DC charger that can handle up to half of the alternator’s full load capacity is sufficient. So the goal is, to match the DC-DC charger to the charging capabilities of the alternator,
By evaluating the alternator’s charging capacity and selecting an appropriate DC-DC charger, we can continue to design your DIY vehicle electrical system. Understanding the charging dynamics empowers us to make informed decisions and create a reliable electrical setup.
IV. List Electrical Needs
Making an inventory of all electrical appliances and devices
The next step building a bombproof DIY vehicle electrical system is big! We are creating a comprehensive inventory of our electrical appliances and devices. This includes both current and future considerations. We begin by listing the appliances we already possess or have a firm intention of acquiring. However, we must also account for those „wish-list“ items that may not be immediate needs. Those things that are common among overlanders or within our budget’s reach. It’s important to think about these potential additions! Planning for them during the setup phase proves far simpler than retrofitting later on.
Let me repeat that for you once more. Planning for them during the setup phase proves far simpler than retrofitting later on.
Here is why: A DIY vehicle electrical system demands labor-intensive effort, particularly when it comes to wiring. Running an additional wire during the initial phase is efficient and cost-effective. Conversely, modifying and recalculating an existing setup, including introducing additional wires, can be intricate and costly. By thoughtfully anticipating our electrical needs and possible expansions, we ensure easy, adaptability and cost-efficiency for future modifications.
Determining total power requirements
Our next step involves calculating the aggregate power requirements of our electrical devices. This process necessitates tabulating the amperage (Amps) of each appliance. Typically, these values represent Amps per hour, giving us a snapshot of the maximum Amps consumed simultaneously. This figure serves as our benchmark—a vital reference for sizing our DIY vehicle electrical system accurately.
Recognizing this absolute Amps threshold is crucial. It assists us in designing a system that can handle several requests at the same time. Also in defining rules for regulating power distribution. (More on that at a later point.) This understanding serves as the foundation for our system’s limitations and capabilities, allowing us to optimize our design.
With an in-depth grasp of our power requirements, we’re now able to construct a DIY vehicle electrical system that aligns with our needs and ambitions.
V. Calculate Power Consumption
Estimating daily and weekly power usage
Acknowledging that appliances don’t operate continuously, we introduce a second tier of calculation—a more nuanced assessment. A approximation of the number of Amps drawn or used per hour. This figure, heavily influenced by our lifestyle choices, is pivotal in determining the battery’s longevity and size.
We want to estimate the number of amps per hour in our DIY vehicle electrical system as accurately as we can. We start by identifying each appliance’s amperage rating. Next, factor in the time each appliance is expected to operate within one hour. Multiply the amperage rating by the hours of operation for each device, and sum up these values for all appliances. This cumulative amperage gives us an approximation of the total amps drawn per hour.
That gives us an estimation to work with. It forecasts how long our battery can sustain our chosen lifestyle. Particularly during periods when the motor isn’t running, such as overnight halts. By aligning our power usage with battery capacity, we ensure that our power demands harmonize with our system’s capabilities.
Sizing the battery bank
Selecting the appropriate battery size is a critical aspect of designing a robust DIY vehicle electrical system. The calculations from our power consumption estimation steer us in determining the optimal battery capacity. This capacity governs our ability to operate appliances without depleting the battery to critical levels.
By comprehending our Amp-hour (Ah) requirements and establishing how long we intend to run our electrical system autonomously, we can select a battery that aligns precisely with our needs.
Battery Sizing Calculation:
Using the formula: Battery Capacity (Ah) = Estimated Amp-hour (Ah) / Discharge Depth (%)
Here, the Discharge Depth represents the Depth of Discharge (DoD), which indicates the percentage of the battery’s total capacity that can be used without causing damage. Different battery chemistries offer varying levels of DoD, affecting their longevity and efficiency.
Comparative Analysis of Battery Types:
To aid in our decision-making, we can use a comparative table to assess different battery types in terms of Life Cycles, DoD, and the percentage of actual usable power:
| Battery Type | Life Cycles | DoD (%) | Usable Power (%) |
|---|---|---|---|
| Lead-Acid | 200-300 | 50-70 | 35-50 |
| AGM | 400-500 | 70-80 | 55-65 |
| Lithium-Ion | 1000+ | 80-90 | 70-80 |
| LiFePO4 | 2000+ | 80-90 | 70-80 |
As seen in the table, LiFePO4 (Lithium Iron Phosphate) batteries stand out with an exceptionally high number of Life Cycles, providing great longevity. They offer an equally impressive depth of discharge (DoD) and usable power as Lithium-Ion batteries. This combination of attributes makes LiFePO4 batteries a premium choice for those seeking an enduring and efficient power solution in their DIY vehicle electrical system.
As the table illustrates, Lead-Acid batteries offer a lower number of Life Cycles and limited usable power due to their lower DoD. AGM batteries, on the other hand, strike a balance between Life Cycles and usable power, making them suitable for a budget friendly DIY vehicle electrical system.
On a side note: We have replaced the (2) starter batteries of our Land Cruiser 100 Series with Start-Stop capable AGMs and have not had any issues in the past 3 years. They also get trickled charged and topped up by our solar charging system.
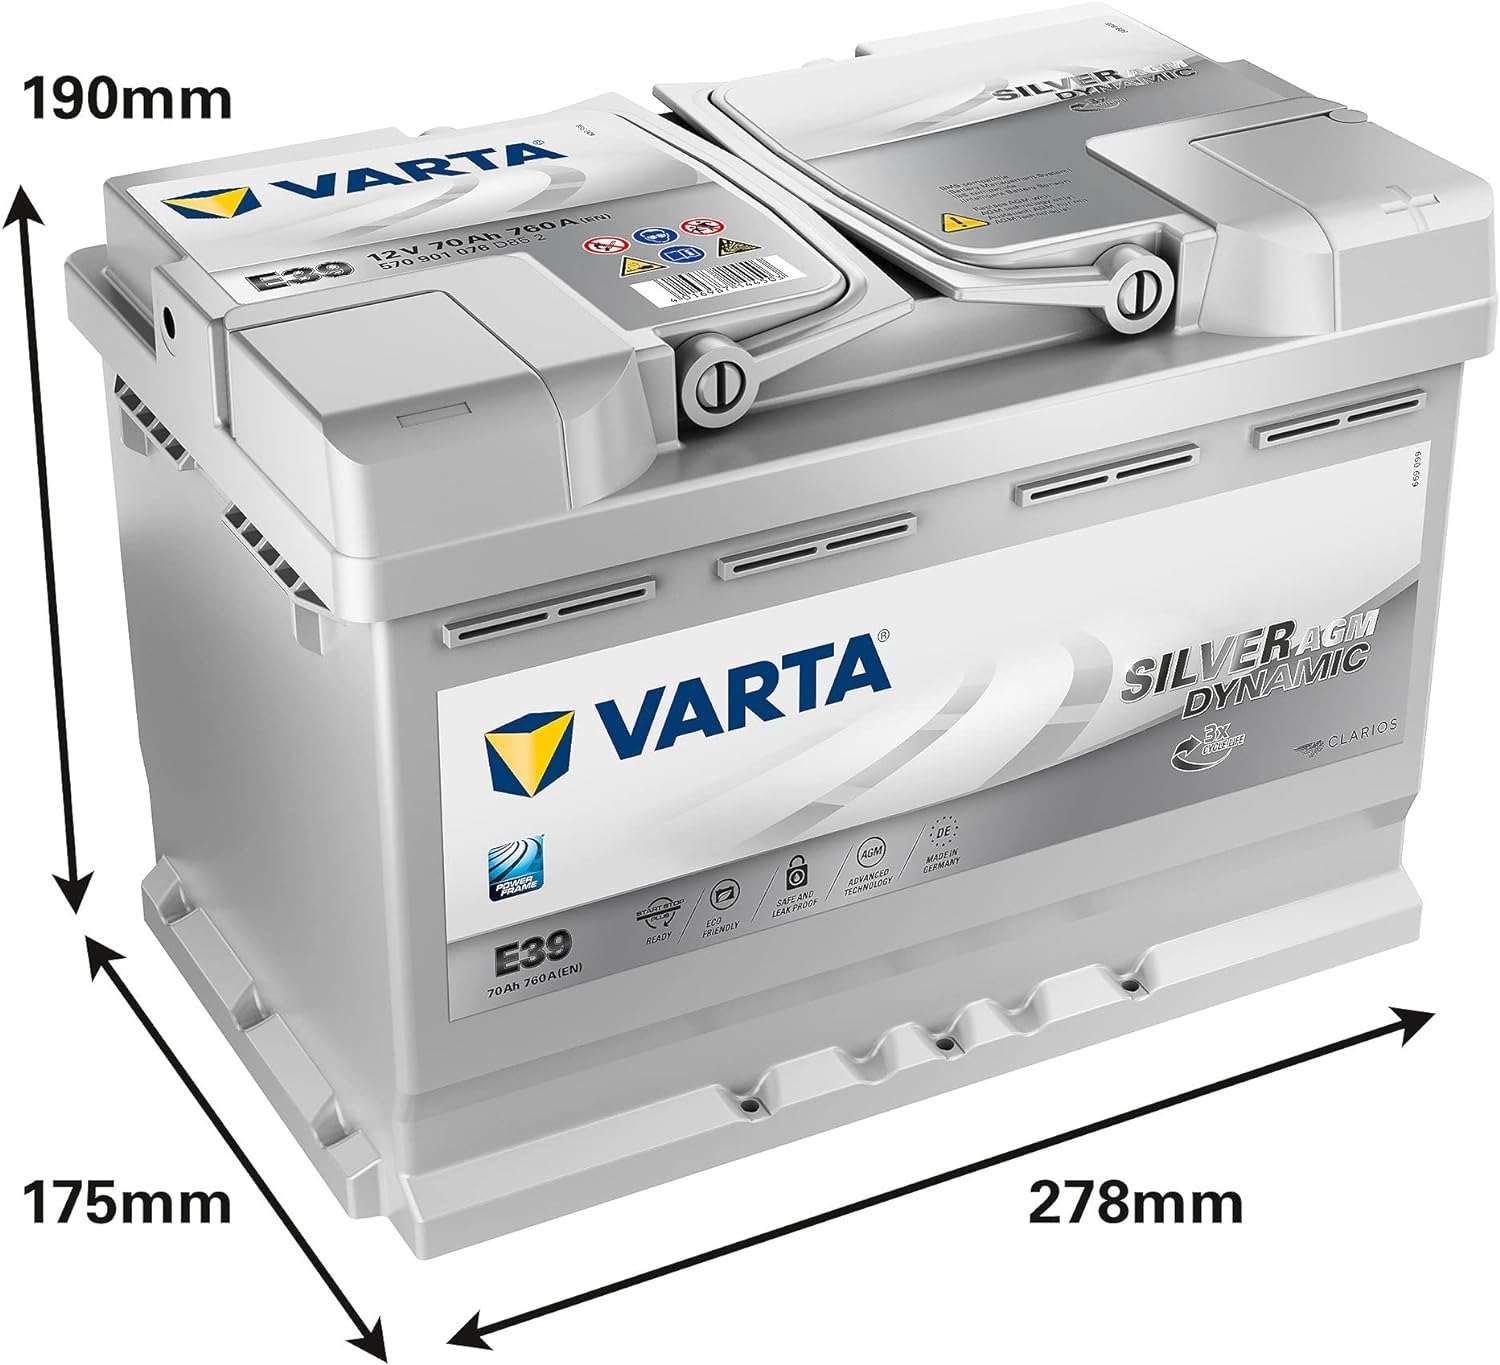
Varta Start-Stopp AGM 70Ah 760A
- More resilient to deep discharge
- Responds well to trickle charging
Example On How To Choose The Right Battery Size For Overlanding
Here are the numbers:
- Alternator provides around 110A
- DC-DC/Solar charge controller provides up to 140A
- Very adventurous Lifestyle of 4Ah
- We stay at camp for about 12h
- With the option to stay for 36h
| Battery Type | Life Cycles | DoD (%) | Usable Power (%) | Required Battery Capacity (Ah) | Total A after 12 hours | Total A after 36 hours |
|---|---|---|---|---|---|---|
| Lead-Acid | 200-300 | 50-70 | 35-50 | 8 – 11.4 | 96 – 136.8 | 288 – 410.4 |
| AGM | 400-500 | 70-80 | 55-65 | 5.7 – 6.7 | 68.4 – 80.4 | 205.2 – 240.6 |
| Lithium-Ion | 1000+ | 80-90 | 70-80 | 4.4 – 5 | 52.8 – 60 | 158.4 – 180 |
| LiFePO4 | 2000+ | 80-90 | 70-80 | 4.4 – 5 | 52.8 – 60 | 158.4 – 180 |
With this information, we opted to install a 100Ah LifePo4 battery in our Toyota Land Cruiser 100. Given the budget constraints, we also designed and put together our setup to accommodate a second 100Ah LifePo4 at a later stage.
Read more about our DIY Vehicle Electrical System in our 100 Series Land Cruiser over HERE: Coming Soon
With power consumption calculations at hand and battery bank sizing aligned, our DIY vehicle electrical system nears its comprehensive design.

VI. Define Load Priorities
Preventing draining the battery: choosing the right charge controller
In our quest for a resilient DIY vehicle electrical system, safeguarding against battery drain is paramount. Selecting an appropriate charge controller plays a pivotal role in this endeavor. It has become almost an industry standard, but it’s imperative to ensure that the chosen charge controller can effectively prioritize the starting battery, preventing it from depleting by automatically disconnecting less critical appliances.
To assist in making an informed choice, here’s a concise checklist for selecting the ideal charge controller for your vehicle battery system:
- Low Voltage Cut-off: Ensure it has a low voltage cut-off feature to protect against excessive battery depletion.
- Trickle Charge Starter Battery: Look for the capability to trickle charge the starter battery, maintaining its health.
- Jump-start Capability: Check if the controller offers jump-start capability, a valuable feature for emergencies.
Prioritizing essential appliances to manage power usage.
Not all appliances hold equal importance. Ensuring the continuous operation of critical components, particularly during emergencies, takes precedence over less vital functions like an evening reading light or a water pump for showering.
We recommend adopting a three-tier system of priorities:
- Emergency Communication: This must remain functional under all circumstances.
- Starter Battery: It must have the ability to start the vehicle for as long as needed, often achieved through redundancy like our Land Cruiser 100, which comes with two starting batteries from the factory.
- Everything Else: All other appliances fall into this category.
While it may sound complex, setting up this system is straightforward once you understand its principles. By selecting the right charge controller, you can effectively manage priorities two and three. Furthermore, incorporating a handheld, battery-operated emergency device simplifies the process. Connecting the charging cable to the auxiliary battery ensures that in the event of auxiliary battery depletion, the starter battery remains protected, and the emergency device continues running on its own battery, ready to address any unforeseen emergencies.
By embracing these strategies, we can design a DIY vehicle electrical system that not only caters to our power needs but also offers the peace of mind that our essential functions remain operational, even in challenging situations.
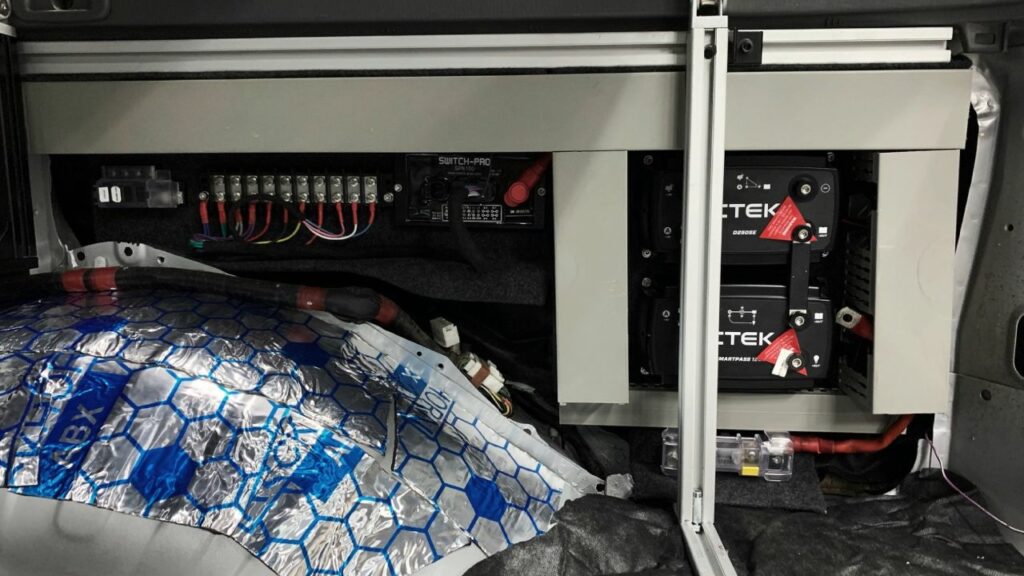
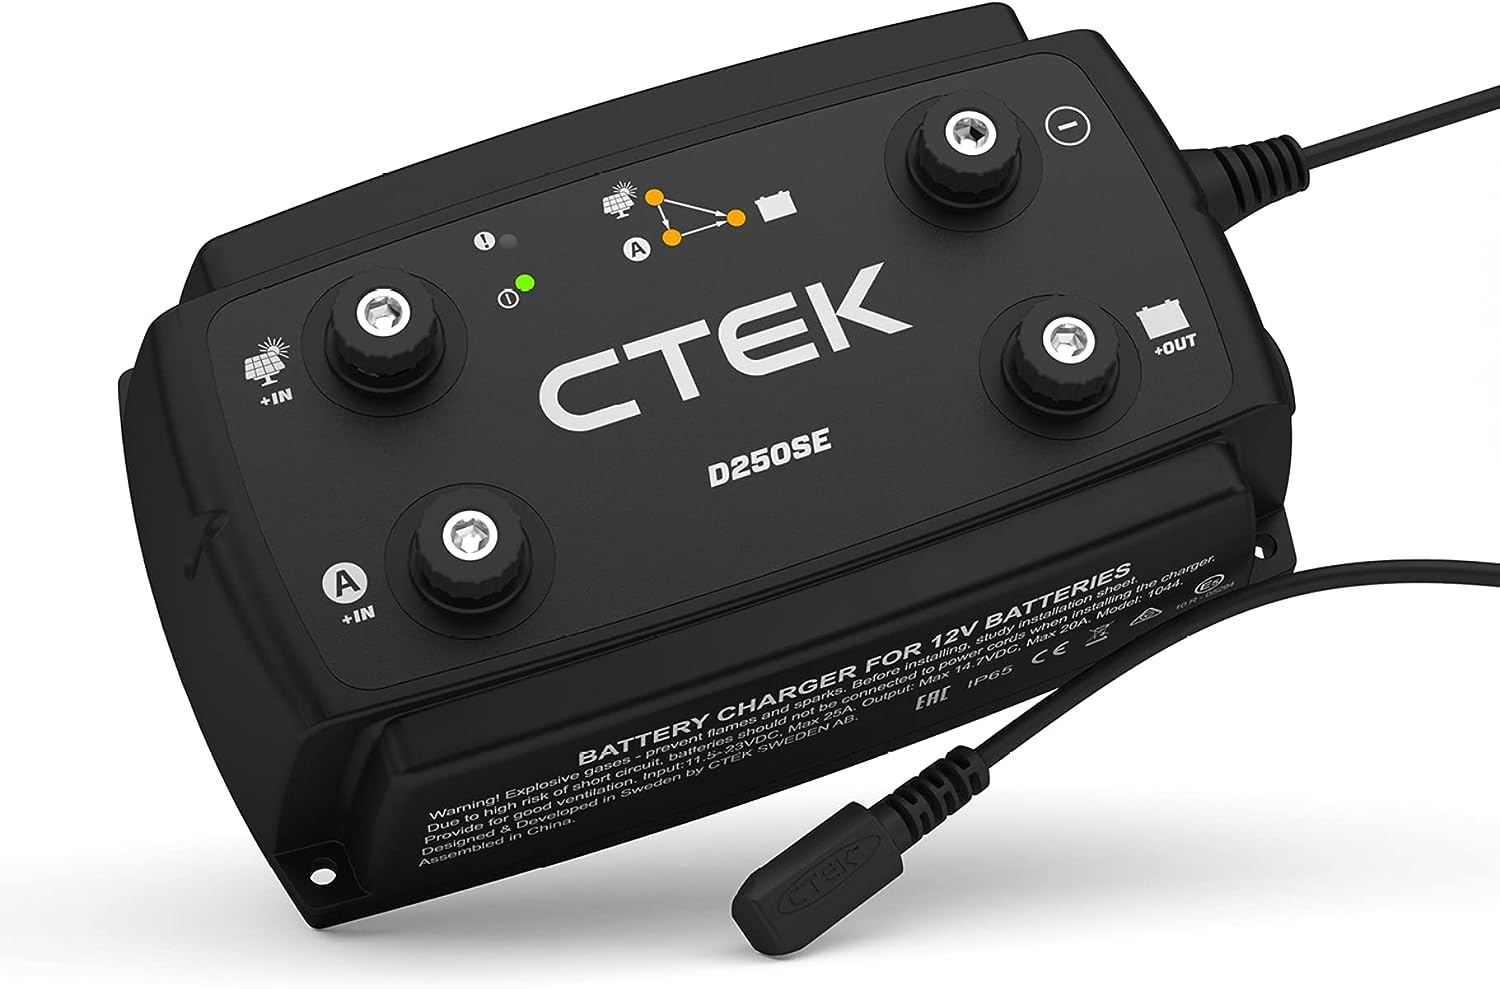
CTEK DS250SE (Solar Controller)
- Will automatically redirect maintenance charge power to the starter battery
- Solar Panel Regulator with Maximum Power Point Tracking (MPPT)
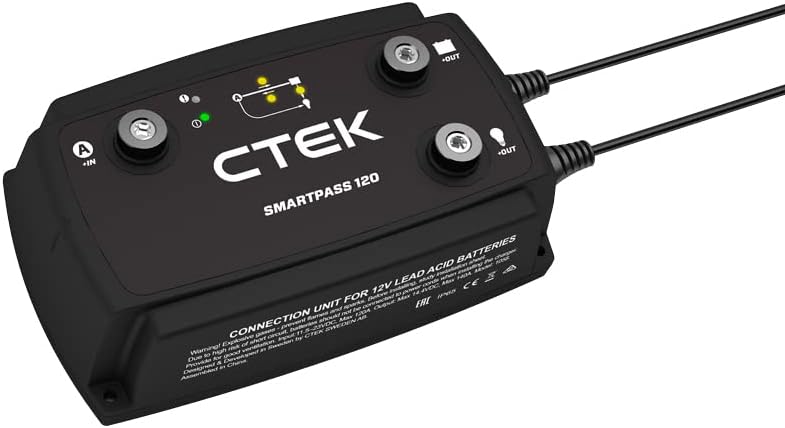
CTEK SMARTPASS (Charger)
- Designed to properly manage and distribute power
- integrated ‚battery guard‘ which protects batteries from harmful total discharge
VII. Other Charging Sources
Determining how to recharge the system on the road
While our discussions have primarily focused on the reliability of the alternator and solar power as our main sources for recharging our DIY vehicle electrical system, we mustn’t overlook a valuable third option: shore power. Depending on our style of travel, shore power can become a vital asset. It involves planning stops at designated locations with available electrical hookups, offering a dependable means of rejuvenating our power supply.
Shore Power as a Charging Option
The integration of shore power into our DIY vehicle electrical system can vary in complexity. It can range from setting up a complete 230V system to a simpler approach involving a quality car battery charger, an extension cord, and power adapters suitable for different countries. At this stage, it’s wise to consider installing an additional socket designed for the battery charger. This proactive step ensures that we have the option readily available, as it’s more cost-effective to prepare for the possibility and not need it than the reverse. Incorporating this flexibility into our setup enhances our system’s versatility and ensures we’re always well-equipped, regardless of the charging source at hand.
VIII. Assess Space for Solar Panels
Evaluating available space for solar panel installation
In the intricate planning of our DIY vehicle electrical system, assessing the available space for solar panels is a critical step. Typically, these panels find their home on the roof, either directly mounted or on a roof rack. Some creative installations extend to the hood, utilizing otherwise unused space. The key consideration is whether the available space aligns with our energy needs. A rough guideline suggests either halving the Ampere Output provided by the manufacturer or doubling the wattage or space, considering the rarity of optimal conditions.
For our 100 Series Land Cruiser we installed 2 Ective 60W flexible solar panels onto our hood. These provide enough power to keep our fridge running 24/7 without driving. While one panel has a 60W rating, promising around 3Ah in theory the reality looks a little bit different. With 2 panels we roughly get around 1-2Ah that we can rely on.


ECTIVE 60W Flexible Solar Panel
- Flexible and robust construction
- Newest „Shingle“ technology for maximum efficiency
Determine if an additional independent solar blanket is needed
Given our preference for shaded parking during longer stays, considering an additional solar blanket becomes prudent. This portable solar solution not only supplements energy generation but also serves as a versatile asset. Connectable to the vehicle, it ensures a continuous power supply even when parked in the shade. Moreover, it doubles as a convenient shade for the windshield in scenarios where parking in shade isn’t feasible, such as at border crossings. This thoughtful addition enhances the adaptability of our DIY vehicle electrical system, making it well-suited for diverse travel conditions.

IX. Create Wiring Diagram
Visualizing the system layout and connections
In the meticulous planning of our DIY vehicle electrical system, it’s time to bring our vision to life. With a rough sketch, compile all the gathered information about the components, considering their optimal placement within the vehicle. Prioritize placing electrical components away from heat and water, ensuring both safety and longevity. Mark potential cable entry points through the body, and take note of approximate cable lengths and distances.
Using a wiring diagram software or paper and making a plan
Now comes the heart of the operation—creating a comprehensive wiring diagram. Whether employing specialized software or the simplicity of paper, this step is both time-consuming and paramount. While developing the system, we become intimately acquainted with its intricacies. This knowledge proves invaluable on the road and facilitates troubleshooting. Additionally, a well-documented plan acts as a roadmap for ourselves or any professional assisting later.
At this juncture, we delve into details, determining wire sizes and selecting connectors based on the demands of each component. This meticulous planning ensures not only the functionality but also the resilience of our DIY vehicle electrical system. For a more in-depth exploration of wire sizes, refer to the second part of this series HERE.
X. Managing Financial Expectations for a DIY Vehicle Electrical System
Where to Save Money
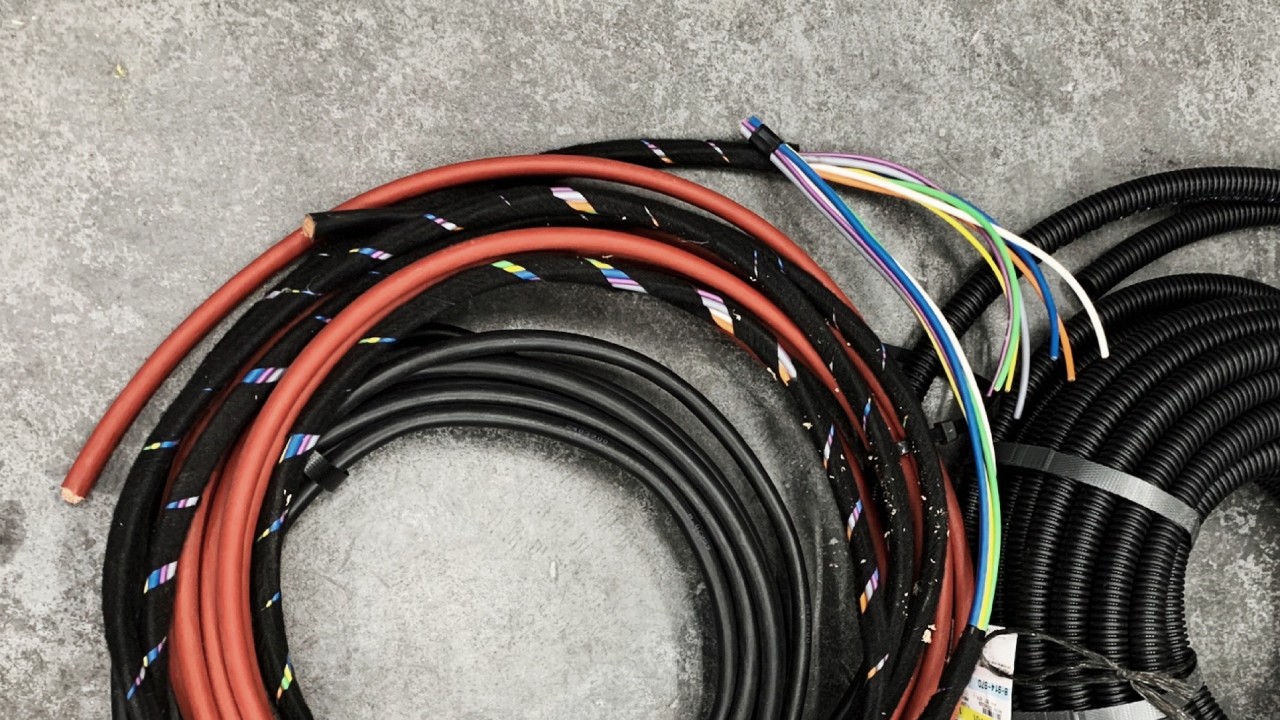
In our pursuit of a cost-effective DIY vehicle electrical system, significant savings lie in the realm of labor. Learning to route cables, pass them through conduits, and crimp connections, although straightforward, is time-intensive. Investing time in self-education pays off, enabling substantial savings. Moreover, diligent planning, starting with a proper installation plan and keeping it updated, proves invaluable. Skipping this step is a costly mistake.
Where Not to Save Money
For those less experienced, seeking professional guidance during the planning stage and learning fundamental skills is advisable. Opt for quality components with proper certifications and paperwork for peace of mind. Cutting corners in these areas may compromise the system’s reliability and safety. After all, electrical failures are the cause of almost all vehicle fires in Overlanding travels.
Budgeting Tips
- Bulk Purchases: With a well-documented plan, buying cables in bulk becomes feasible, minimizing costs.
- Precision Planning: Accurately estimate cable lengths by running a rope beforehand, preventing unnecessary reordering.
- Standardization: Consider buying the same sizes of bus bars and terminal blocks, potentially reducing costs without sacrificing functionality.
Embracing these practices ensures not only a cost-efficient DIY vehicle electrical system but also one that meets quality and safety standards.
XI. Conclusion
In our exploration of crafting a robust DIY vehicle electrical system, we’ve navigated through critical stages. From assessing vehicle capabilities and alternator output to calculating power consumption and prioritizing loads, each step contributes to a comprehensive and efficient setup.
The meticulous planning of solar panel installation, the strategic consideration of charging sources, and the thoughtful management of financial expectations all play crucial roles. Emphasizing the importance of self-education and professional guidance where needed ensures a balance between cost savings and system reliability.
In conclusion, our DIY vehicle electrical system embodies a fusion of knowledge, strategic planning, and hands-on skills. By adhering to best practices and leveraging the expertise shared, we embark on our journeys well-prepared, confident in the sustainability and resilience of our personalized power solution.
Embarking on your DIY vehicle electrical system journey is a rewarding venture, and we’re here to support you every step of the way. If you find yourself in need of further assistance, guidance, or have questions about planning and preparing your personalized setup, don’t hesitate to reach out. Our team is ready to share insights, offer advice, and help you build a reliable, efficient, and tailored DIY vehicle electrical system. Your road to self-sufficiency starts with a well-designed power solution. Connect with us, and let’s make your overland adventures electrifying.

