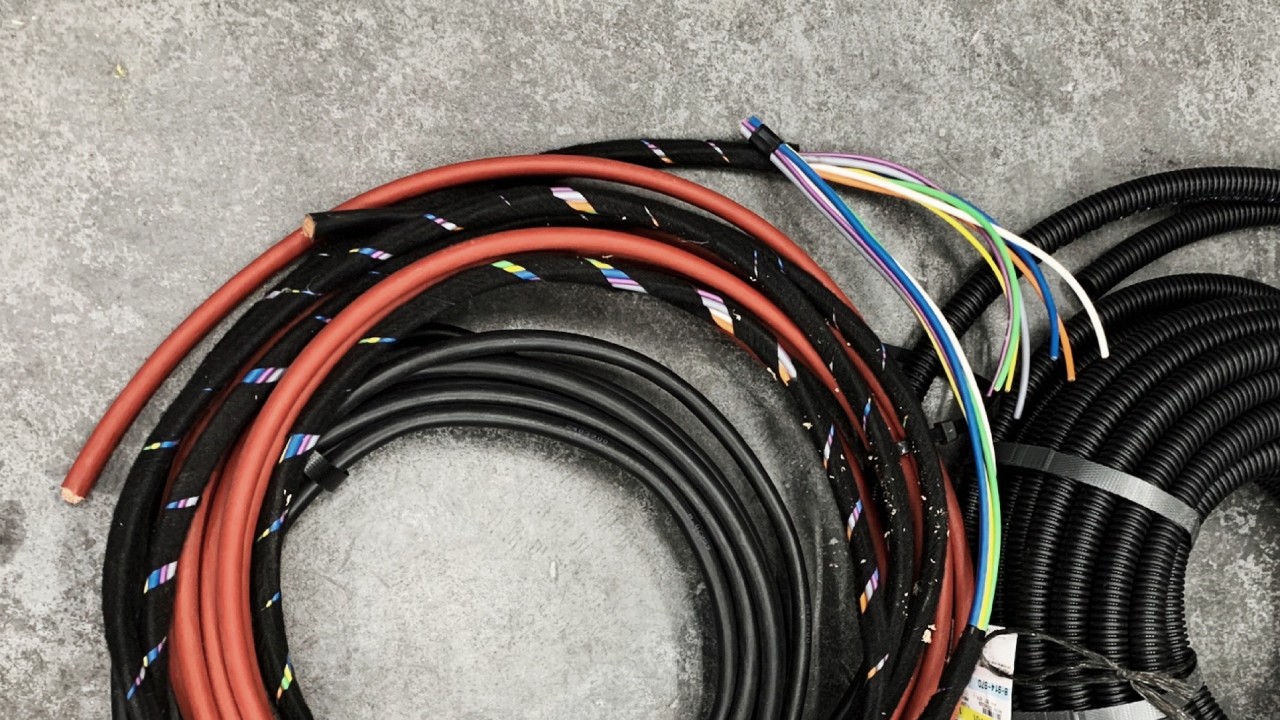
This is a multi-part series on electrical systems for overland vehicles. In this installment we delve into how to choose the best wire sizes for overlanding vehicles.
- I. Introduction
- II. Understanding Wire Temperatures and Performance
- The Impact of Ambient Temperature
- Heat Dissipation and Wire Capacity in Extreme Conditions
- III. Factors to Consider in Wire Selection
- IV. Wiring Safety and Precautions
- V. Practical Wire Sizing for Overland Vehicles
- VI. Why Most Guides on Wire Sizes for Overlanding May Be Wrong
- VII. Custom Wire Size Reference Guide
- VIII. Frequently Asked Questions (FAQ)
- VIII. Conclusion
I. Introduction
Ensuring the best wire sizes for overlanding is crucial in our journey to optimize DIY vehicle electrical systems. It’s not just about functionality; it’s about reliability under diverse overland conditions.
Embarking on overland adventures introduces a spectrum of challenges. From scorching deserts to freezing tundras, understanding the electrical demands is essential. Our exploration extends beyond just wire sizing; it’s about crafting resilient DIY vehicle electrical systems that stand up to the rigors of the road.
Curious about the first step? Read our previous post on Planning and Building DIY Vehicle Electrical Systems HERE.
II. Understanding Wire Temperatures and Performance
Before we delve into the technical details, let’s briefly address the impact of climate and temperatures on electrical components. As our planet experiences environmental shifts, we must consider the implications for our vehicle’s electrical setup. Ensuring our components can endure varying temperatures is vital for safe and successful overland travel.
The Impact of Ambient Temperature
When it comes to overland travel, rising temperatures present unique challenges for our vehicle’s electrical system. One key consideration is the operating temperature of regular PVC wires. However, during our adventurous journeys, our vehicles may be exposed to extreme temperatures, especially when parked in the scorching sun.
Average Temperatures in Different Destinations
In Saharan African countries, the yearly average temperature hovers around 20°C. Similarly, in US cities like Phoenix, Las Vegas, and San Antonio, the average temperatures align with the 20°C mark. Venturing to Western Australia, we find areas with temperatures exceeding 25°C, and the list of such destinations could go on.
The significance of these temperature averages lies in our overland adventures. As we traverse diverse landscapes, it’s safe to assume that we will encounter numerous days where temperatures soar beyond the 30°C mark.
Imagine a hot day with ambient temperatures of 30°C. Inside the vehicle, the temperature can soar to around 56°C. This drastic temperature difference can affect the performance of electrical components, necessitating careful planning of wire sizes for safe and optimal operation.
How Temperatures Inside Vehicle Change Exposed To Direct Sunlight
| Ambient Temp (°C) | 5min (°C) | 10min (°C) | 30min (°C) | 60min (°C) |
|---|---|---|---|---|
| 20 (68°F) | 24 (75°F) | 27 (81°F) | 36 (97°F) | 46 (115°F) |
| 24 (75°F) | 28 (82°F) | 31 (88°F) | 40 (104°F) | 50 (122°F) |
| 30 (86°F) | 34 (93°F) | 37 (99°F) | 46 (115°F) | 56 (133°F) |
| 34 (93°F) | 38 (100°F) | 41 (105°F) | 50 (122°F) | 60 (140°F) |
| 40 (104°F) | 44 (111°F) | 47 (116°F) | 56 (133°F) | 66 (151°F) |
To ensure a reliable electrical system during overland travel, we must account for the impact of rising temperatures on our components. The key is to choose wire sizes that can handle the heat and deliver consistent performance, enabling us to embark on unforgettable adventures with confidence.
Heat Dissipation and Wire Capacity in Extreme Conditions
These temperature changes impact wire performance and, if not addressed properly, can lead to critical failures in the electrical setup. In intense heat, wires may struggle to cool down, while freezing temperatures can make them brittle and prone to damage.
Ampacity Considerations
To ensure reliable electrical performance, we must account for wire capacity to carry current in extreme conditions. In high temperatures, a wire’s ampacity may decrease, causing overloading, overheating and potential fire hazards.
Ampacity refers to the maximum current-carrying capacity of a wire without exceeding its temperature rating.
Regular PVC cables typically have a operating temperature up to 70°C (158°F) under constant load. Choosing the best wire sizes for overlanding means adjusting the wire size to accommodate the changing ampacity.
Wires with high-temperature resistance can be a solution too. They will just not be available everywhere. Lastly we are not big fans of mixing cable types and unnecessarily complicating the electrical system.
III. Factors to Consider in Wire Selection
Ampacity and Current Requirements for Off-Road Travel
When it comes to overland travel, the electrical demands placed on the vehicle’s wiring can be quite challenging. Off-road adventures often involve power-hungry equipment, such as winches, auxiliary lighting, refrigerators, air compressors and the charging multiple handheld devices. These devices each draw significant currents, and the wires must be able to handle them safely.
Know the maximum current requirements of each electrical component and the total length of wire from the battery and back. The latter is called the length of the circuit.
Choosing the Right Wire Gauge Chart for Overland Vehicles
Selecting the appropriate wire gauge is fundamental to a reliable electrical system in overland vehicles. Wire gauge determines the cross-sectional area of the wire and directly affects its ampacity. Thicker wires have lower resistance and can carry more current, making them suitable for higher power applications.
To choose the right wire gauge, it’s essential to consider both the length of the wire run(the length of the circuit) and the maximum current it will carry. Longer wire runs experience more resistance, which can lead to voltage drops and reduced efficiency. A wire gauge chart provides guidance on the suitable wire size based on the current capacity and length of the wire.
Using a wire gauge chart, we can find the best wire sizes for overlanding and for each electrical circuit in the vehicle. Ensuring that the wires can handle the required current without issues. Proper wire sizing reduces the risk of overheating, voltage drops, and electrical failures, providing a robust and dependable electrical system to support our adventure journeys.
IV. Wiring Safety and Precautions
Preventing Electrical Fires: Tips for Safe Wiring Practices
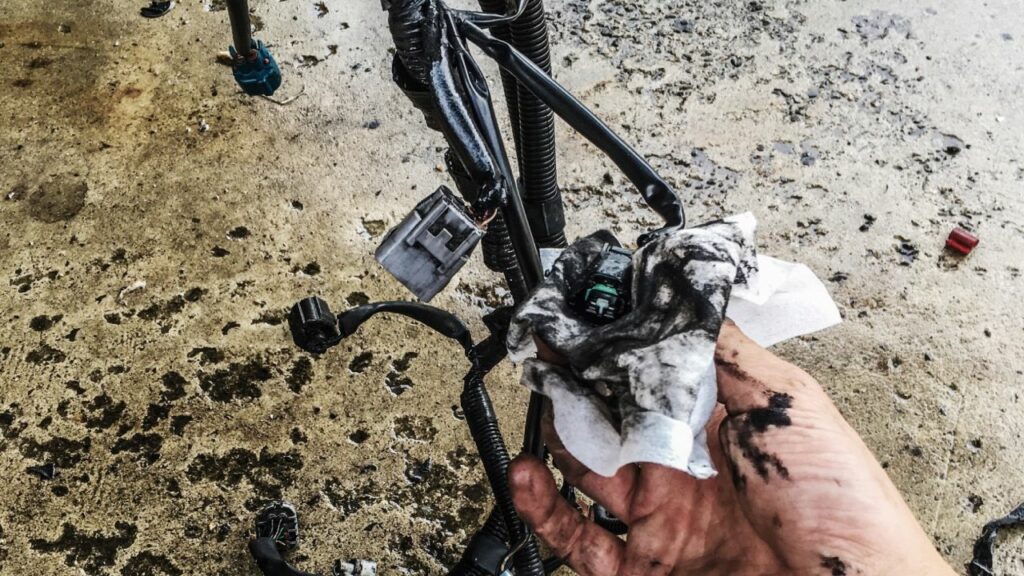
Electrical failures are a significant concern in any vehicle, especially during off-road adventures where access to emergency services may be limited. To safeguard against electrical fires, implementing safe wiring practices is paramount.
- Proper Insulation: Ensure all wires are appropriately insulated and protected from abrasion and potential damage. Insulation prevents short circuits and reduces the risk of electrical fires.
- Secure Wiring Layout: Organize, label and secure wires in a clean and well-structured layout. Avoid loose or tangled wires that could get entangled in moving parts or exposed to extreme temperatures.
- Avoid Overloading: Never exceed the ampacity of the wires or use them for applications beyond their capacity. Overloading can lead to overheating and fire hazards.
- Use High-Quality Components: Utilize high-quality wires, connectors, and terminals. Cheap or substandard components may fail under load, increasing the risk of fires.
- Regular Inspections: Conduct routine inspections of the electrical system to check for wear, damage, or signs of overheating. Address any issues on the spot.
- Proper Grounding: Ensure a solid electrical ground for the vehicle’s electrical system. Adequate grounding helps prevent electrical faults and potential fires. When in doubt, use the same wire size. We recommend not to use the body for ground at all. Especially with auxillary battery systems
Fuse and Circuit Breaker Selection for Overland Vehicles
Fuses and circuit breakers are the second most important safety components that protect the vehicle’s electrical system from excessive currents and short circuits. Choosing the right fuses and circuit breakers is crucial to ensure reliable protection.
Because they are as critical as choosing the best wire sizes for overlanding we dedicate a specific article in our multi-part series on electrical systems just for fuses and circuit breakers. Once it is published you will find it here:
Sign up for the newsletter now to get notified of new articles when they get published!
V. Practical Wire Sizing for Overland Vehicles
Step-by-Step Guide to Determining Optimal Wire Gauges
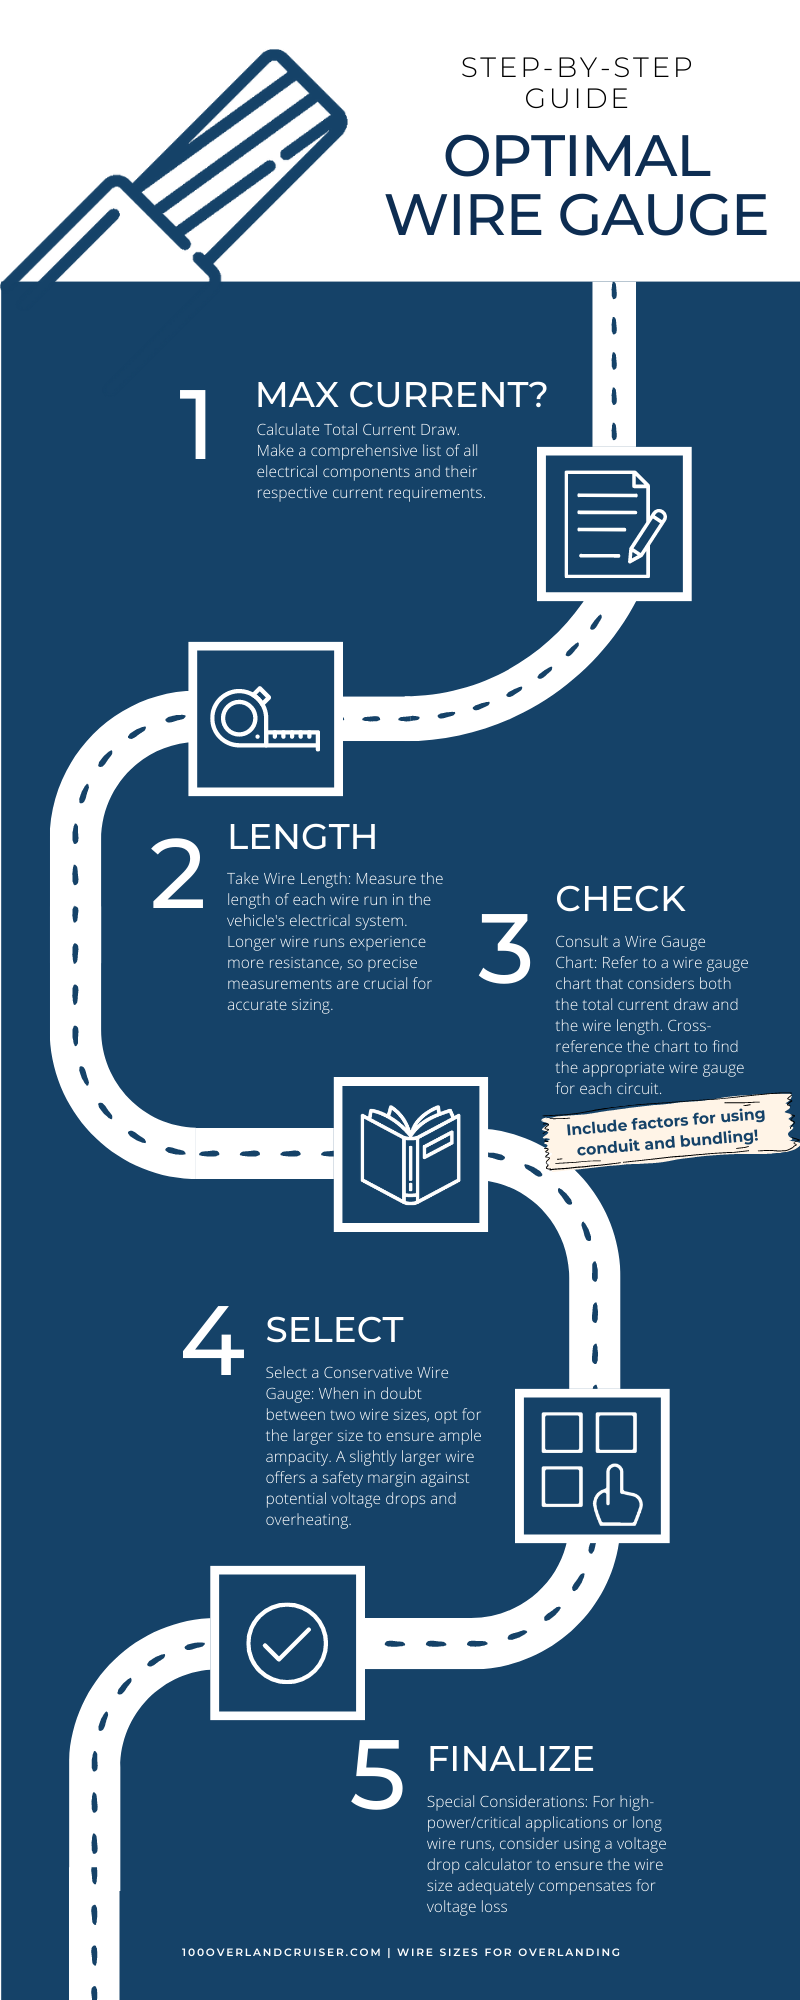
You have read this before: Proper wire sizing is essential to ensure efficient and safe electrical systems in overland vehicles. Follow this step-by-step guide to determine the best wire sizes for overlanding:
- Calculate Total Current Draw: Make a comprehensive list of all electrical components and their respective current requirements.
- Take Wire Length: Measure the length of each wire run in the vehicle’s electrical system. Longer wire runs experience more resistance, so precise measurements are crucial for accurate sizing.
- Consult a Wire Gauge Chart: Refer to a wire gauge chart that considers both the total current draw and the wire length. Cross-reference the chart to find the appropriate wire gauge for each circuit. Our favorite, non-adjusted chart can be found HERE:
- Select a Conservative Wire Gauge: When in doubt between two wire sizes, opt for the larger size to ensure ample ampacity. A slightly larger wire offers a safety margin against potential voltage drops and overheating. More on that is coming next!
- Special Considerations: For high-power/critical applications or long wire runs, consider using a voltage drop calculator to ensure the wire size adequately compensates for voltage loss.
Best Practices for Bundling and Conduit Usage
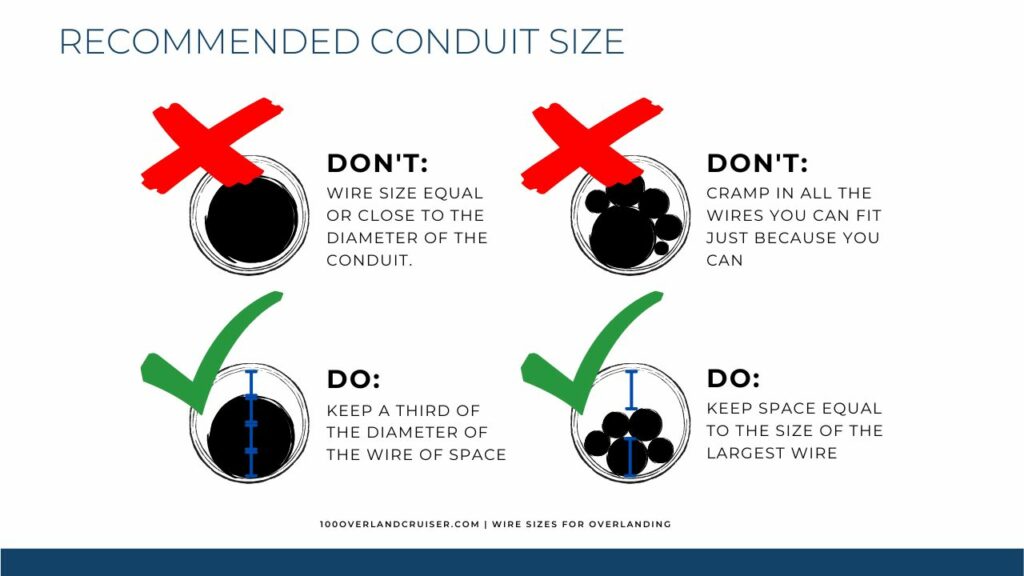
Bundling wires and using conduits offer protection and organization to the vehicle’s electrical system. Follow these best practices for bundling and conduit usage:
- Avoid Overcrowding: Do not overload conduit or wire bundles with too many wires. Overcrowding can lead to excessive heat buildup and hinder heat dissipation. A rule of thumb is a conduit diameter 30% bigger than the diameter of the cable. Or when bundling, have enough space around the bundle equal to the biggest individual wire diameter used in the bundle.
- Separate Wiring: Keep high-voltage wires and low-voltage signal wires separate to prevent interference and potential damage to sensitive electronics.
- Secure Bundles: Use zip ties or appropriate clamps to secure wire bundles and prevent movement during vehicle operation. We are loving this type of cotton tape for bundling.
- Use Heat-Resistant Conduits: In areas where wires may be exposed to extreme heat, use heat-resistant conduits to protect the wires and maintain their integrity. We recommend to prevent that altogether and just route the cables a different way.
- Avoid Sharp Bends: Minimize sharp bends in wires and conduits to prevent stress and potential wire damage. Bends are compressing the cable, reducing its cross-section.
- Weather Protection: Utilize weather-resistant conduits and connectors to shield the electrical system from moisture and dust, especially when traveling through challenging environments. We also like to use heat-shrink tubing with glue.
By following just this practical wire sizing guide and implementing best practices for bundling and conduit usage, you can create a safe electrical system, right? In contrary to most guides you will find online, we don’t think that is enough.
VI. Why Most Guides on Wire Sizes for Overlanding May Be Wrong
A Typical Example of How Most People Are Doing It
Imagine you’ve just installed a new solar panel on the roof of your overland vehicle, and it’s providing a healthy 20 Amps at around 14-18V. Excitedly, you consult a commonly used wire gauge chart to determine the recommended cable diameter. The chart suggests using a 2.5mm or 14AWG wire for runs up to 6m/20ft, and that seems perfect for your setup. You go ahead and bundle the cables with other electrical components like reverse lights and awning lights, and also put them in a protective conduit to shield them from UV rays and the elements. Everything seems excellent so far!
The Misconceptions: What is Wrong with Most Wire Gauge Charts
However, there are some critical misconceptions in many wire gauge charts that can lead to incorrect choices and potentially unsafe installations:
- Ambient Temperature Consideration: Most wire gauge charts recommend wire sizes based on an ambient temperature of 30°C. As we have discussed earlier in this article this is not the best idea. In real-world overlanding scenarios, especially on a hot day or when wiring is routed through the engine compartment, temperatures can easily exceed 30°C. As we already know by now, higher temperatures significantly impact wire performance, leading to reduced ampacity and potential overheating issues.
- Installation Conditions: Wire gauge charts often assume the wires are installed freely, with at least their diameter’s spacing between other surfaces. In practice, wires may be bundled together or placed in conduits to protect them from various environmental factors. Such bundling and conduit usage affects heat dissipation and can further reduce the safe ampacity of the wires.
Due to these misconceptions, the actual safe ampacity of the wires may be lower than what the chart suggests. Consequently, when relying solely on generic wire gauge charts, there is a risk of using wires that are undersized for the application’s specific conditions. This undersizing can lead to overheating, voltage drops, and potential electrical hazards during your overland adventures.
To avoid these issues, it’s essential to consider real-world conditions and temperature variations when selecting the best wire sizes for your overlanding electrical system. Consulting specialized charts that account for ambient temperatures and installation conditions will ensure you make informed decisions, resulting in a safe and reliable electrical setup that can handle the challenges of overland travel.
VII. Custom Wire Size Reference Guide
Addressing Variations and Real-World Applications: How to Size Wires for Overlanding
Let’s revisit our solar panel installation example from before and explore the factors involved in accurately choosing the ideal cable size.
According to the official tables for German electricians (VDE), we need to apply specific factors to determine the correct wire size:
- Normal/Ideal Max Current (2.5/14AWG): Using the standard wire size, the maximum current capacity is 32A.
- In Conduit, Bundled with Other Cables: When the wires are bundled in a conduit with at least three other cables, the maximum current capacity reduces to 21A (as per VDE tables).
- At 55°C Ambient Temperature: At elevated temperatures, the wire’s ampacity decreases. At 55°C, the factor applied would be 0.61, resulting in a current capacity of 13A (21A * 0.61).
These findings serve as an eye-opener, as undersized wires are a potential cause of electrical fires. To ensure safety, it is essential to factor in these variations and temperature effects while choosing the best wire sizes for overlanding vehicles. Further considerations for different ambient temperatures are necessary for comprehensive wire sizing.
Introducing Our Reference for the Best Wire Sizes for Overland Vehicles
To address the complexity of the best wire sizes for overlanding and provide a more reliable reference, we have developed a comprehensive wire size table for overlanders. Our reference considers the real-world scenario we talked about in this article. A raised ambient temperature and bundling conditions to accurately determine an appropriate wire gauge for overlanding applications.
For instance, if we consider our solar panel example, we need a cable that can be routed through conduit bundled with other wires while still being rated for at least 33A. Just to be safe, when adjusting the ampacity for the raise in ambient temperature and still be able to run 20A safely. Our reference guide points to a wire size of 10mm or 8AWG (In accordance to VDE tables).
By utilizing our custom wire size reference guide, you can make informed decisions and ensure that your overland vehicle’s electrical system is properly sized and well-equipped to handle the demands of your adventures. Investing in the right wire sizes enhances safety and reliability, minimizing the risk of electrical issues during your travels.
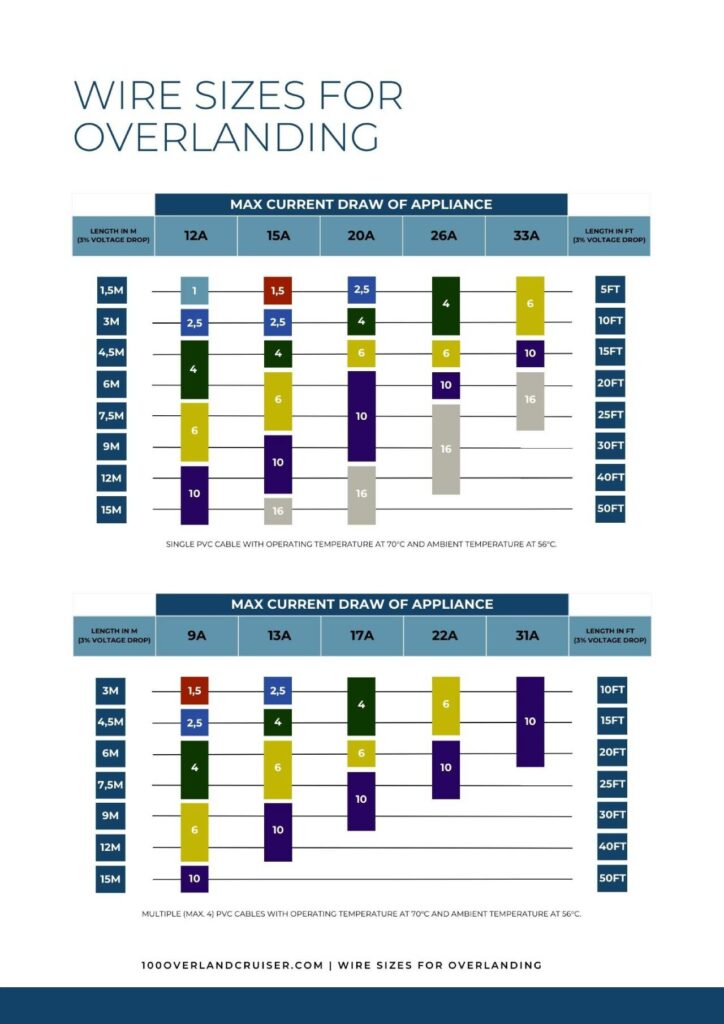
Download The Reference In Hi-Res PDF
VIII. Frequently Asked Questions (FAQ)
VIII. Conclusion
Summary of Best Wire Sizes for Overlanding
In conclusion, choosing the right wire sizes is a critical aspect of building a robust electrical system for overland vehicles. Proper wire sizing ensures efficient power distribution and minimizes the risk of overheating, voltage drops, and potential fire hazards.
For off-road travel, consider the following key points:
- Ampacity and Current Requirements: Take the maximum current draw of your electrical components and select wires with ampacity that exceeds this total current.
- Choosing the Right Wire Gauge: Use specialized wire gauge charts that account for ambient temperatures and installation conditions, such as bundling and conduit usage.
- Fuse and Circuit Breaker Selection: Install appropriate fuses and circuit breakers to protect the electrical system from excessive currents and short circuits. Stay tuned for that article in our multi-part series.
Encouragement to Optimize Electrical Systems for Peace of Mind
By implementing the recommended wire sizing practices and safety precautions, you can optimize your overland vehicle’s electrical system for peace of mind during your adventures. A well-designed electrical setup ensures reliable power delivery, reducing the likelihood of electrical failures and maximizing your enjoyment of the journey.
Disclaimer
While we have provided a comprehensive guide based on engineering principles, it is essential to acknowledge that we are not certified electricians. The information shared here is intended to offer valuable insights and guidelines for wire sizing in overland vehicles. However, there may be reputable companies using different wire sizes for their products and work due to their specific design considerations and electrical engineering expertise.
We encourage you to exercise due diligence and consult with certified professionals when necessary. The diversity of overlanding vehicles and unique electrical setups require individual assessment. Ultimately, adopting an engineering perspective and the approach we have shared can contribute to building a reliable and robust electrical system for your overland vehicle, instilling confidence as you venture off the beaten path.
If You Want Our Help Personally
Thank you for taking the time to read our post on electrical systems for overland vehicles. If you have specific questions or need personalized assistance in designing your electrical setup, we’re here to help!
Book a personal video call with us today! Let’s work together to ensure we can address your unique concerns, discuss your vehicle’s electrical requirements and provide tailored solutions to optimize your world travel adventures.
Additionally, we invite you to leave a comment below with any thoughts, feedback, or experiences.

